This is a follow-up blog post to my first post, Using a Controller for Non-Controller Games. If you are looking to use a controller for World of Warcraft or any similar game that doesn’t support controllers, please check out the first blog post, then come back to this one!
Please note that I play on a Private server called ChromieCraft, not on retail.
Setting up in-game
As we covered in the last post, your controller should be all set up from the Steam side of things, BUT that does very little for the game’s side of things. That’s because the only ability bar with keybinds in default WoW is the default ability bar, and we’ll be using all 4 extra ability bars for this.
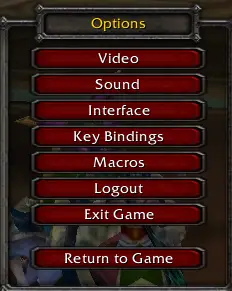
First, you’ll need the extra action bars. Since we’re in World of Warcraft, that means hitting “Escape” then clicking on “interface”.
Under “ActionBars”, on the left side menu, you can select all the action bars so that they show up. I prefer not to lock my action bars, but that’s a personal preference, just like showing the action bar slots, whether there’s an ability in the slot or not.
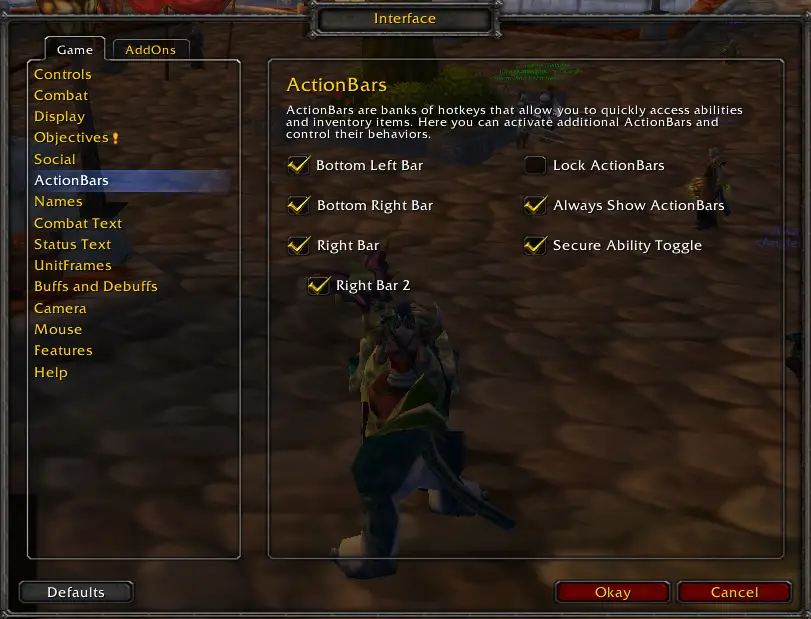
Once you’ve clicked “Okay”, you will be back on the escape menu, where you can now click on “Key Bindings”.
That will lead you to a page full of key bindings for any and all possible things you can bind to a key. Feel free to play around with extra settings, but we won’t be covering each keybind, just what we need.
Bags – a Quality of Life Improvement
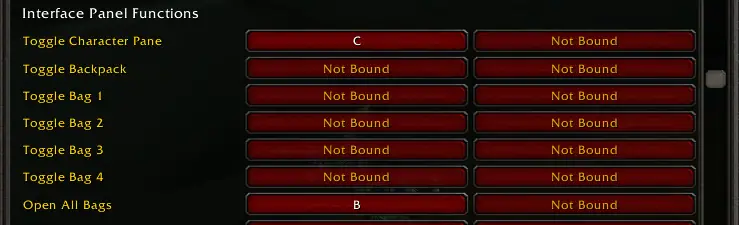
One thing you should do is to make the “Open all Bags” your only bag option. Make sure that it’s the keybind you have set-up for your controller to open bags, otherwise it will only open one of your bags.
To do so, I removed all other keybinds to open specific bags, mostly because I just don’t use them, and put the Backpack keybind (B) as the Open All Bags keybind. Example below:
The Action Bars
One thing you should already have setup as default, and there’s no reason to change it, is your main action bar. It should look like below, and unless you want to remove the unnecessary buttons, there’s nothing to change here.
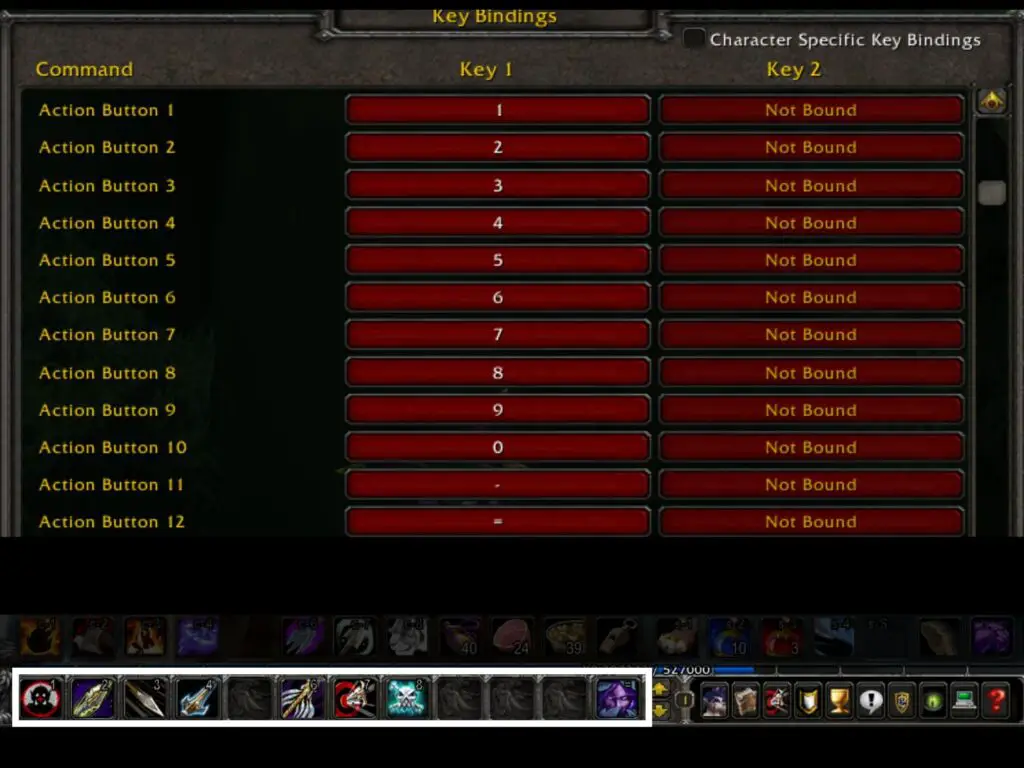
I highlighted which bar we’re setting, so it helps your visual. I chose the numbers for my controller because of the way it would look in-game, so make sure to pick what YOU prefer. My brain doesn’t work like yours… In fact, it barely works most days!
Left and Right additional bars
Since these two action bars are visually on the left and on the right, I used them to represent my left trigger vs my right trigger so that I could easily figure out which trigger to hit. On my left action bar, I use CTRL, which is bound to my left trigger on my controller. On the Right action bar, I use SHIFT, which is bound to the right trigger on my controller.
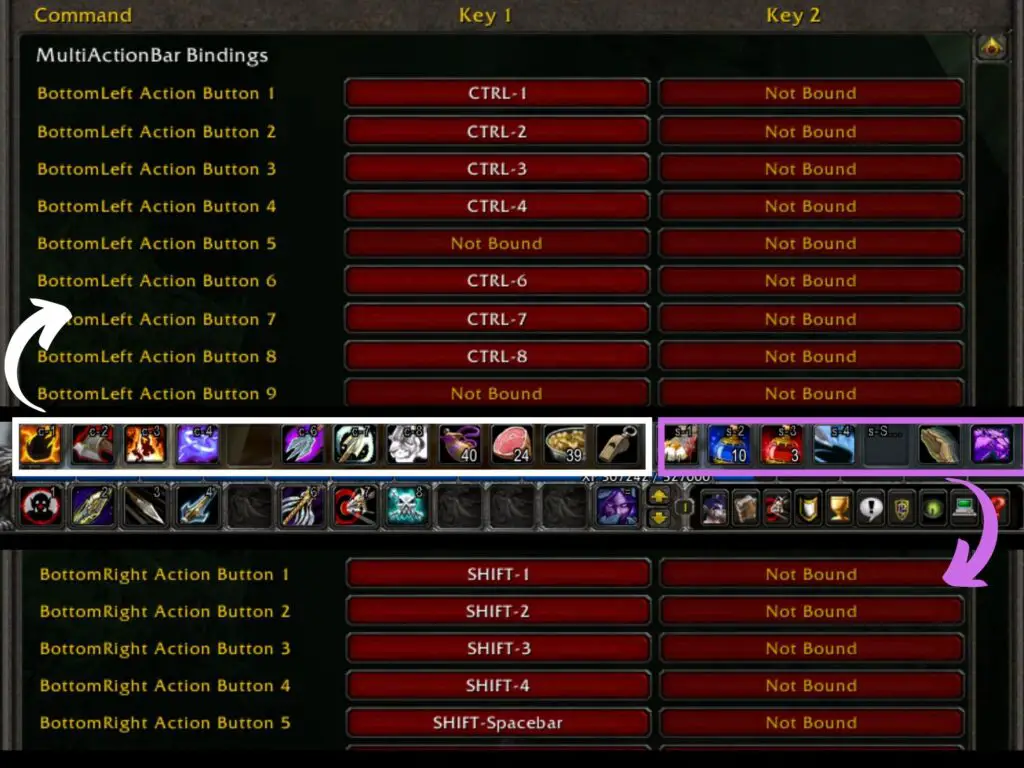
I snuck in the SHIFT+Jump on the right action bar, as well. it’s an extra button, so why not! And thanks to this post, I will be adding CTRL+Jump in the left action bar. it wasn’t in use, so that’s… one more button!
You will also notice that the right action bar is missing some keybinds. You can add SHIFT+6-7-8 here if you want to, but I use these to select friendly party members for healing (more on that below)
I use the Left action bar slots as more offensive attacks, just like the default bar. The Right action bar is potions, self-heals and the like.
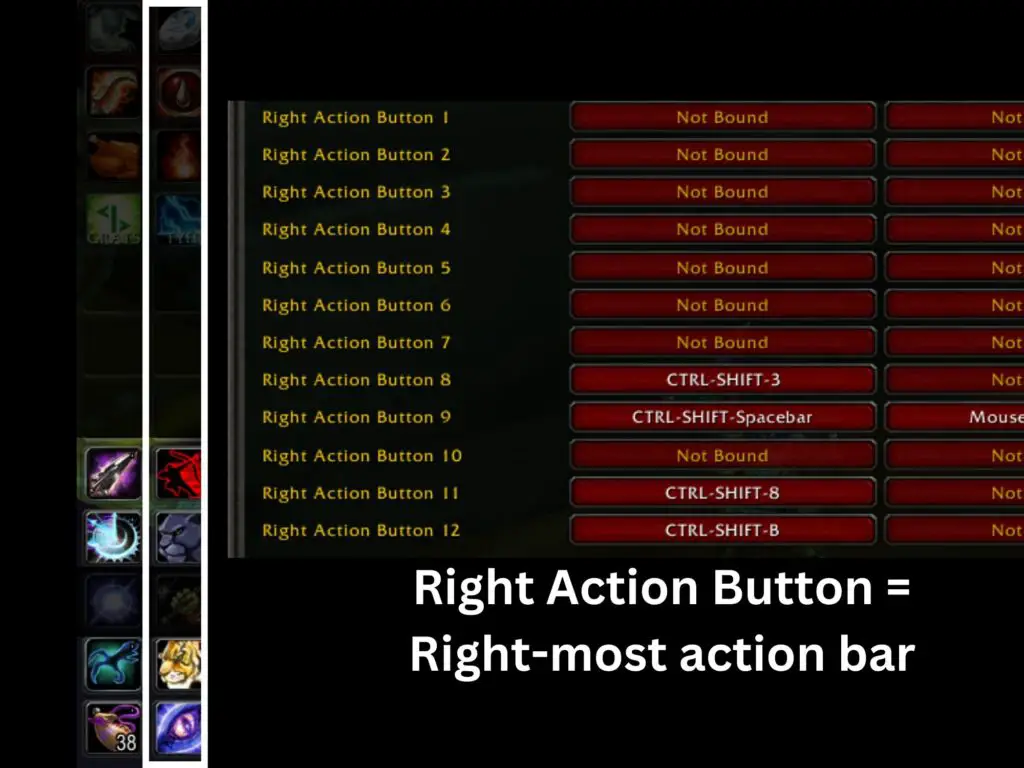
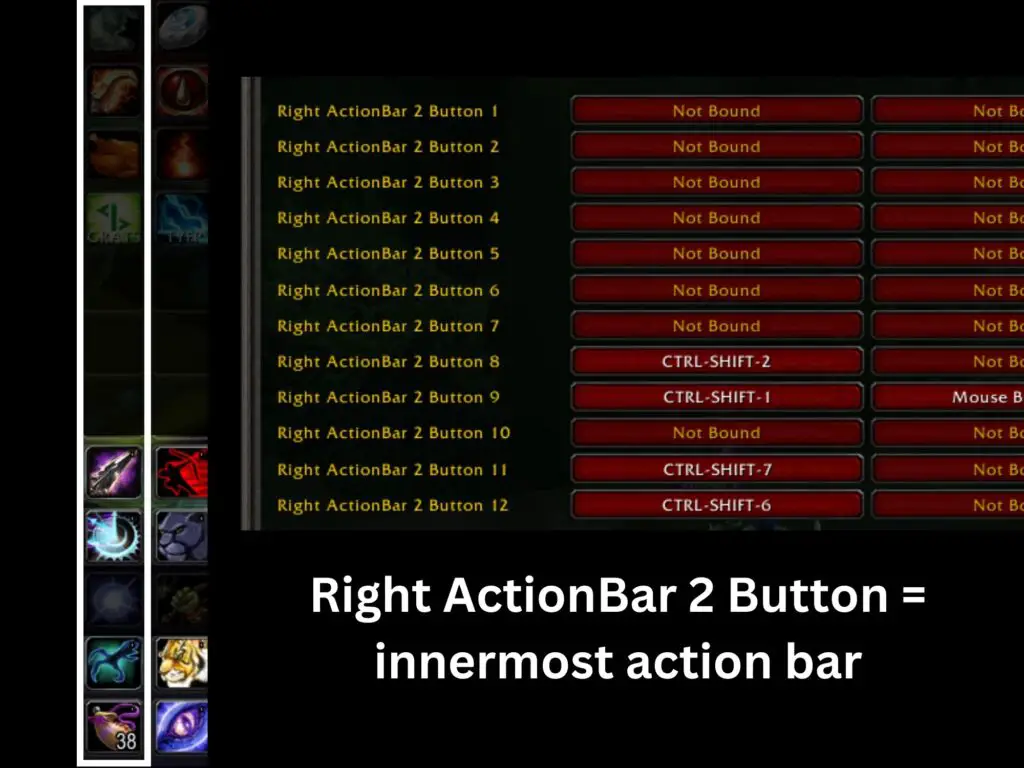
Sidebar
Our side bars, on the right-hand side of the screen, will also host more buttons. It was difficult for me to differentiate between the two action bars, so I hope the visual will help you! Note that I set up my buttons to look like a wheel of 4 buttons because it works best for my visual cues, but it could easily be put differently.
Note that the lower part of the bars is all I’m using, but you could put them higher if you want.
As for the button order, here it is (an image you may recognize from the first blog post). These are the only buttons from the whole bars that I set up, the rest I will click on manually as needed.
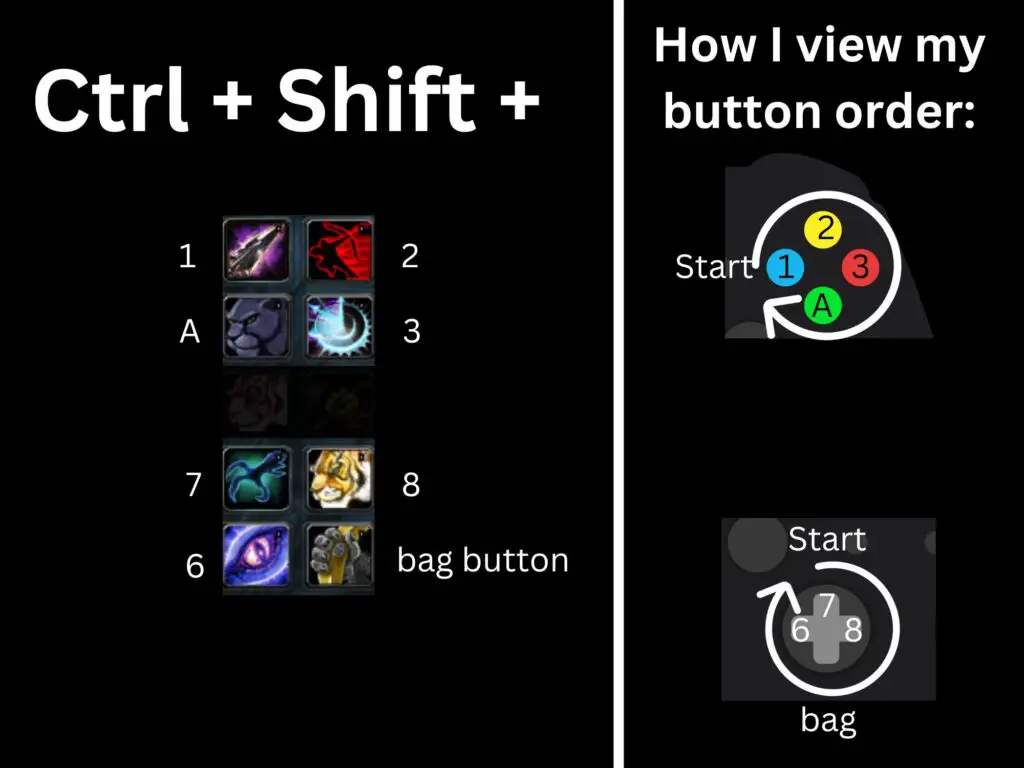
I don’t claim to believe that this button order will work for you, but that’s how I visualize it. make sure to set up your buttons/keybinds how you visualize them best!
These buttons, since they use both triggers at the same time, are meant for spells that I don’t trigger too often. I have cooldowns, my mount, and on other toons I also have my food and drinks. Things I’ll need, but I don’t need them every 3 seconds.
Healing… On Controller?
Well, yes.
You can start by kissing HealBot goodbye, because on a controller, the cursor can’t be moved quite fast enough to make it work. You’re welcome to try, though! But you’ll need to keybind a middle-mouse click somewhere.
Instead, I use the good ol’ fashion target selection + spells.
We covered the keybinds for spells already, so here is my target selection keybinds:
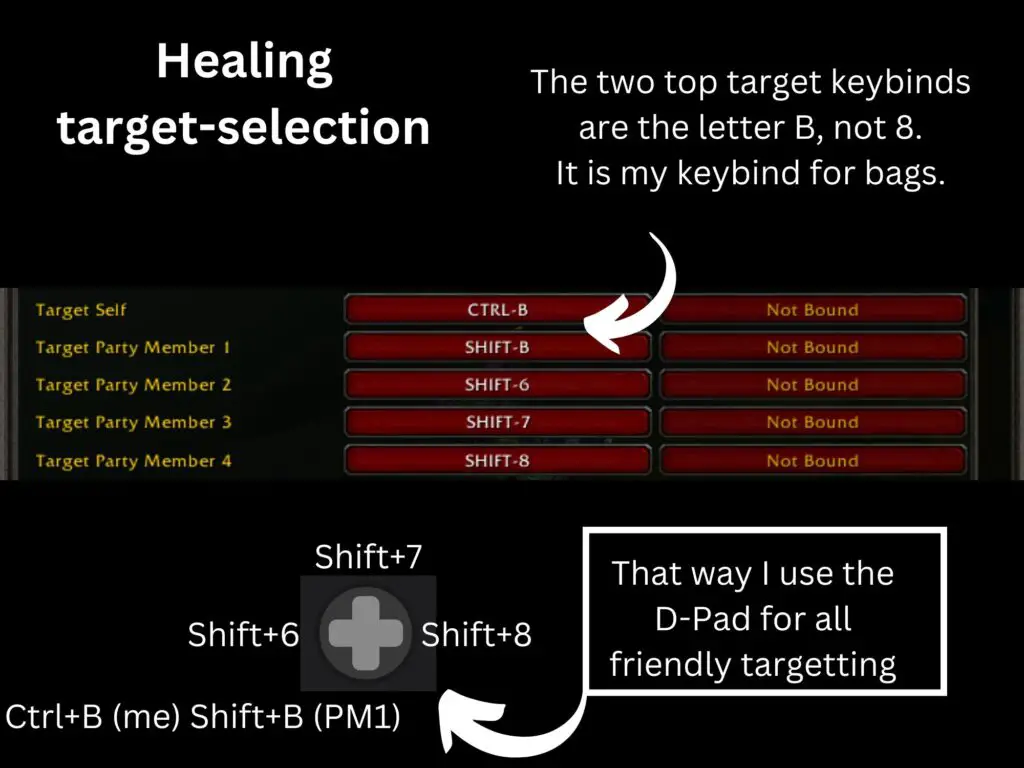
I needed 5 keybinds total, as WoW has 5-player groups. Using the D-pad works, as the inventory button only needs to work without modifying triggers. The odd one out, the only one with the left trigger, is my self-target. The rest of the party is on Shift+DPad. The order, once again, is to your own discretion.
If you’re quite new to WoW, you may not know that the default action bar can be switched (it has two action bars into one). That can be super useful if you like to heal in dungeons, but want to have offensive spells on your default bar when you go questing.

Next to the bar, you’ll see a little arrow up/down, and the number 1. if you click on the arrow up or down, the number will switch to 2, and you’ll have a blank action bar. You can also switch through by holding Shift and scrolling with your mouse.
Is it playable?
Of course! Been playing like that for a while now. I can tank and heal just fine. I won’t deny that there’s a learning curve to it, but it works out well since you start at level 1 and work your way through learning, having more spells, etc!
The only downside to controller is that you can’t talk to people unless your keyboard is close. I usually keep mine close, but for easy communication if it’s not, I have a few macros that spell out things like “/p tyfp” (thank you for playing) so I don’t look rude when leaving a dungeon! I put those up on my action bars and click them as needed.
That’s all there is to know about setting up your action bars and keybinds! Have fun, and see you in-game 🙂